Loop Knots
How to Tie Loop Knots for Fishing
There are numerous types of loop knots used in freshwater and saltwater fishing. We’ll focus on a few of the main ones, namely the Surgeon’s End Loop, the Surgeon’s Dropper loop and the basic Dropper Loop.
Surgeon’s End Loop
This loop is formed at the end of the line for attaching leaders and tackle. It’s easy for novices to tie, is highly reliable and very strong, reaching ninety to ninety-five percent of the line strength.
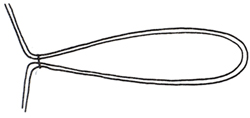
Surgeon’s End Loop Knot Step 1
Pass the loop through the knot two times.
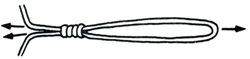
Surgeon’s End Loop Knot Step 2
Hold the line and tag ends and pull the knot as indicated in the image below.

Surgeon’s End Loop Knot Step 3
Surgeon’s Dropper Loop
The Surgeon’s Dropper is tied much the same way as the surgeon loop with the same level of strength and simplicity.
Use this knot for hanging flies, jigs, snelled hooks, sinkers and so on.
Form a loop using the doubled line.
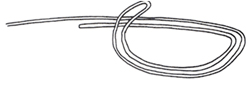
Surgeon’s Dropper Loop Step 1
Form a circle, but make it a little larger than the desired loop as it will shrink once it is tightened.
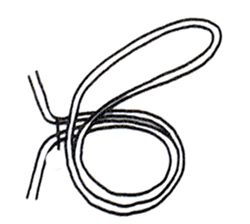
Surgeon’s Dropper Loop Step 2
Tie an overland knot two times as indicated below.
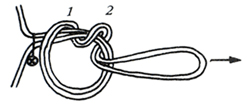
Surgeon’s Dropper Loop Step 3
Hold the line and tag ends and pull the knot as indicated in the image below.
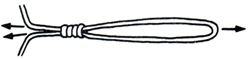
Surgeon’s Dropper Loop Step 4
Dropper Loop
It’s also known as a blood dropper or a blood knot. The dropper loop isn’t all that easy to tie for novice anglers and doesn’t have the same strength of the Surgeon’s loop. However at 80% to 90% of the line’s test, it is pretty strong.
Form a loop at the desired location.
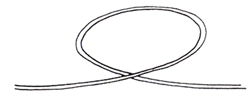
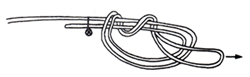
Dropper Loop Knot Step 1
Pull the line from one side of the loop down and pass it through and around the standing line and be sure to hold the loose strands where they cross.
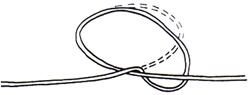
Dropper Loop Knot Step 2
Hold the knot by placing you fingers on either side of the loop with your thumbs twirling the base of the loop until only a small area is open. Make sure that you have about seven twirls in the base (see the figure below).
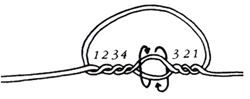
Dropper Loop Knot Step 3
Now push the top or the original loop through the opening left in the bas of the loop. As you may have already figured out, your teeth will have to help on this task.
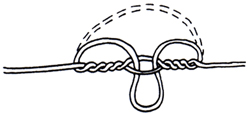
Dropper Loop Knot Step 4
Before pulling the knot tight, moisten it to allow it to pull tight without weakening the line or the knot.